


.avif)
.avif)
.avif)


Get a guide to creating pitch decks presentation


.png)

PowerPoint has two native tools for background removal. The "Remove Background" tool offers a lot of manual control, but it can be frustrating. The second is a hidden gem.
This is PowerPoint's manual option. It works best on images with a clear, high-contrast background. For complex images, it requires patience.
Click on the image you want to edit. This will make the Picture Format tab appear on the main ribbon to the right.
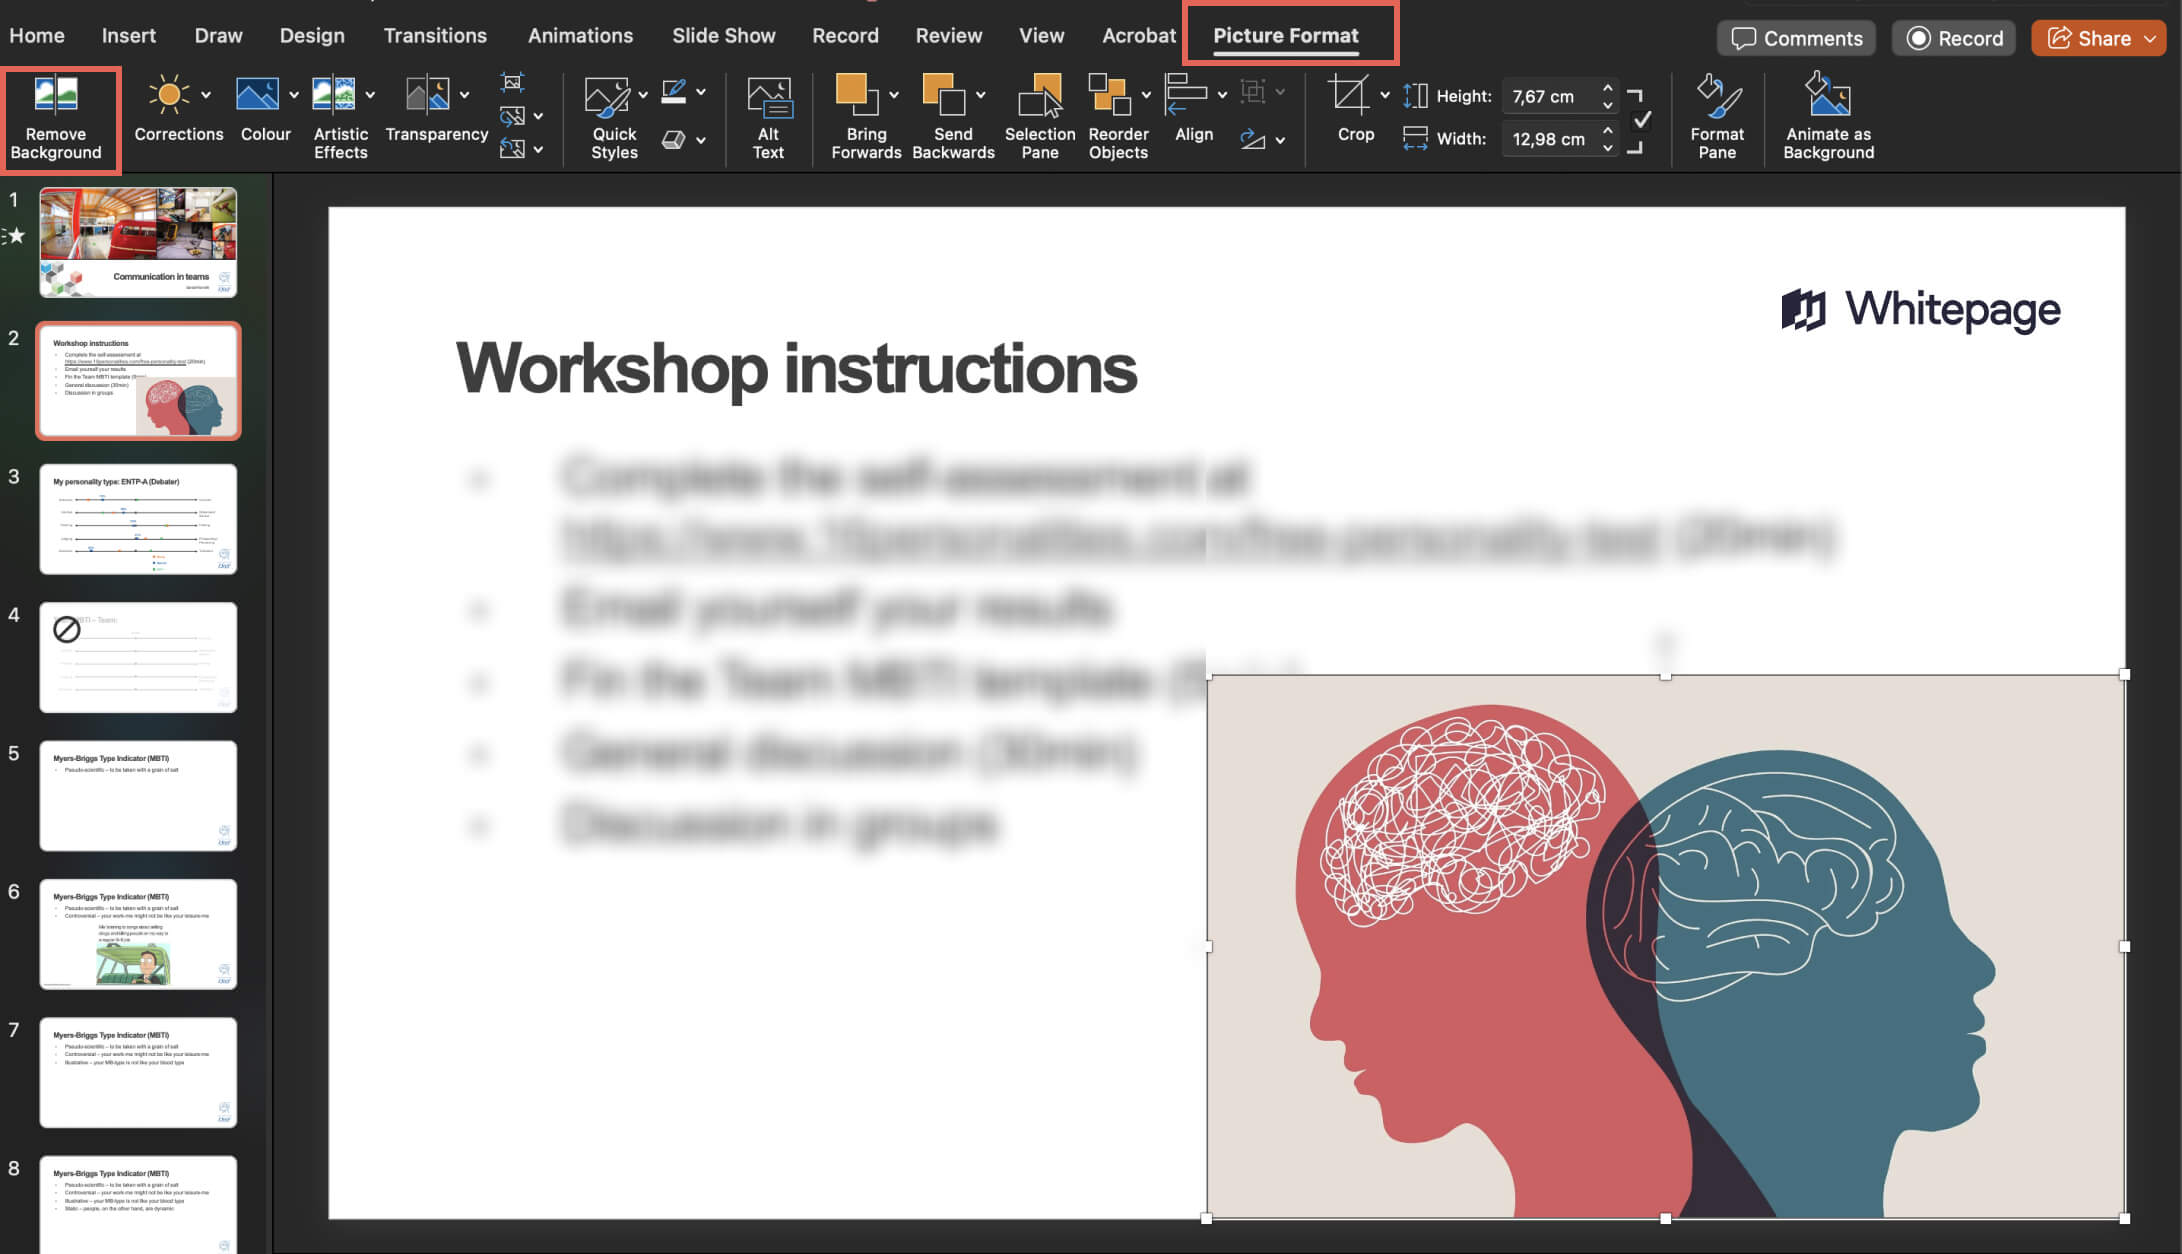
In the Picture Format tab, click Remove Background.
PowerPoint will make its first guess. The area it thinks is the background will be covered in a magenta overlay. Often, this first guess is wrong.
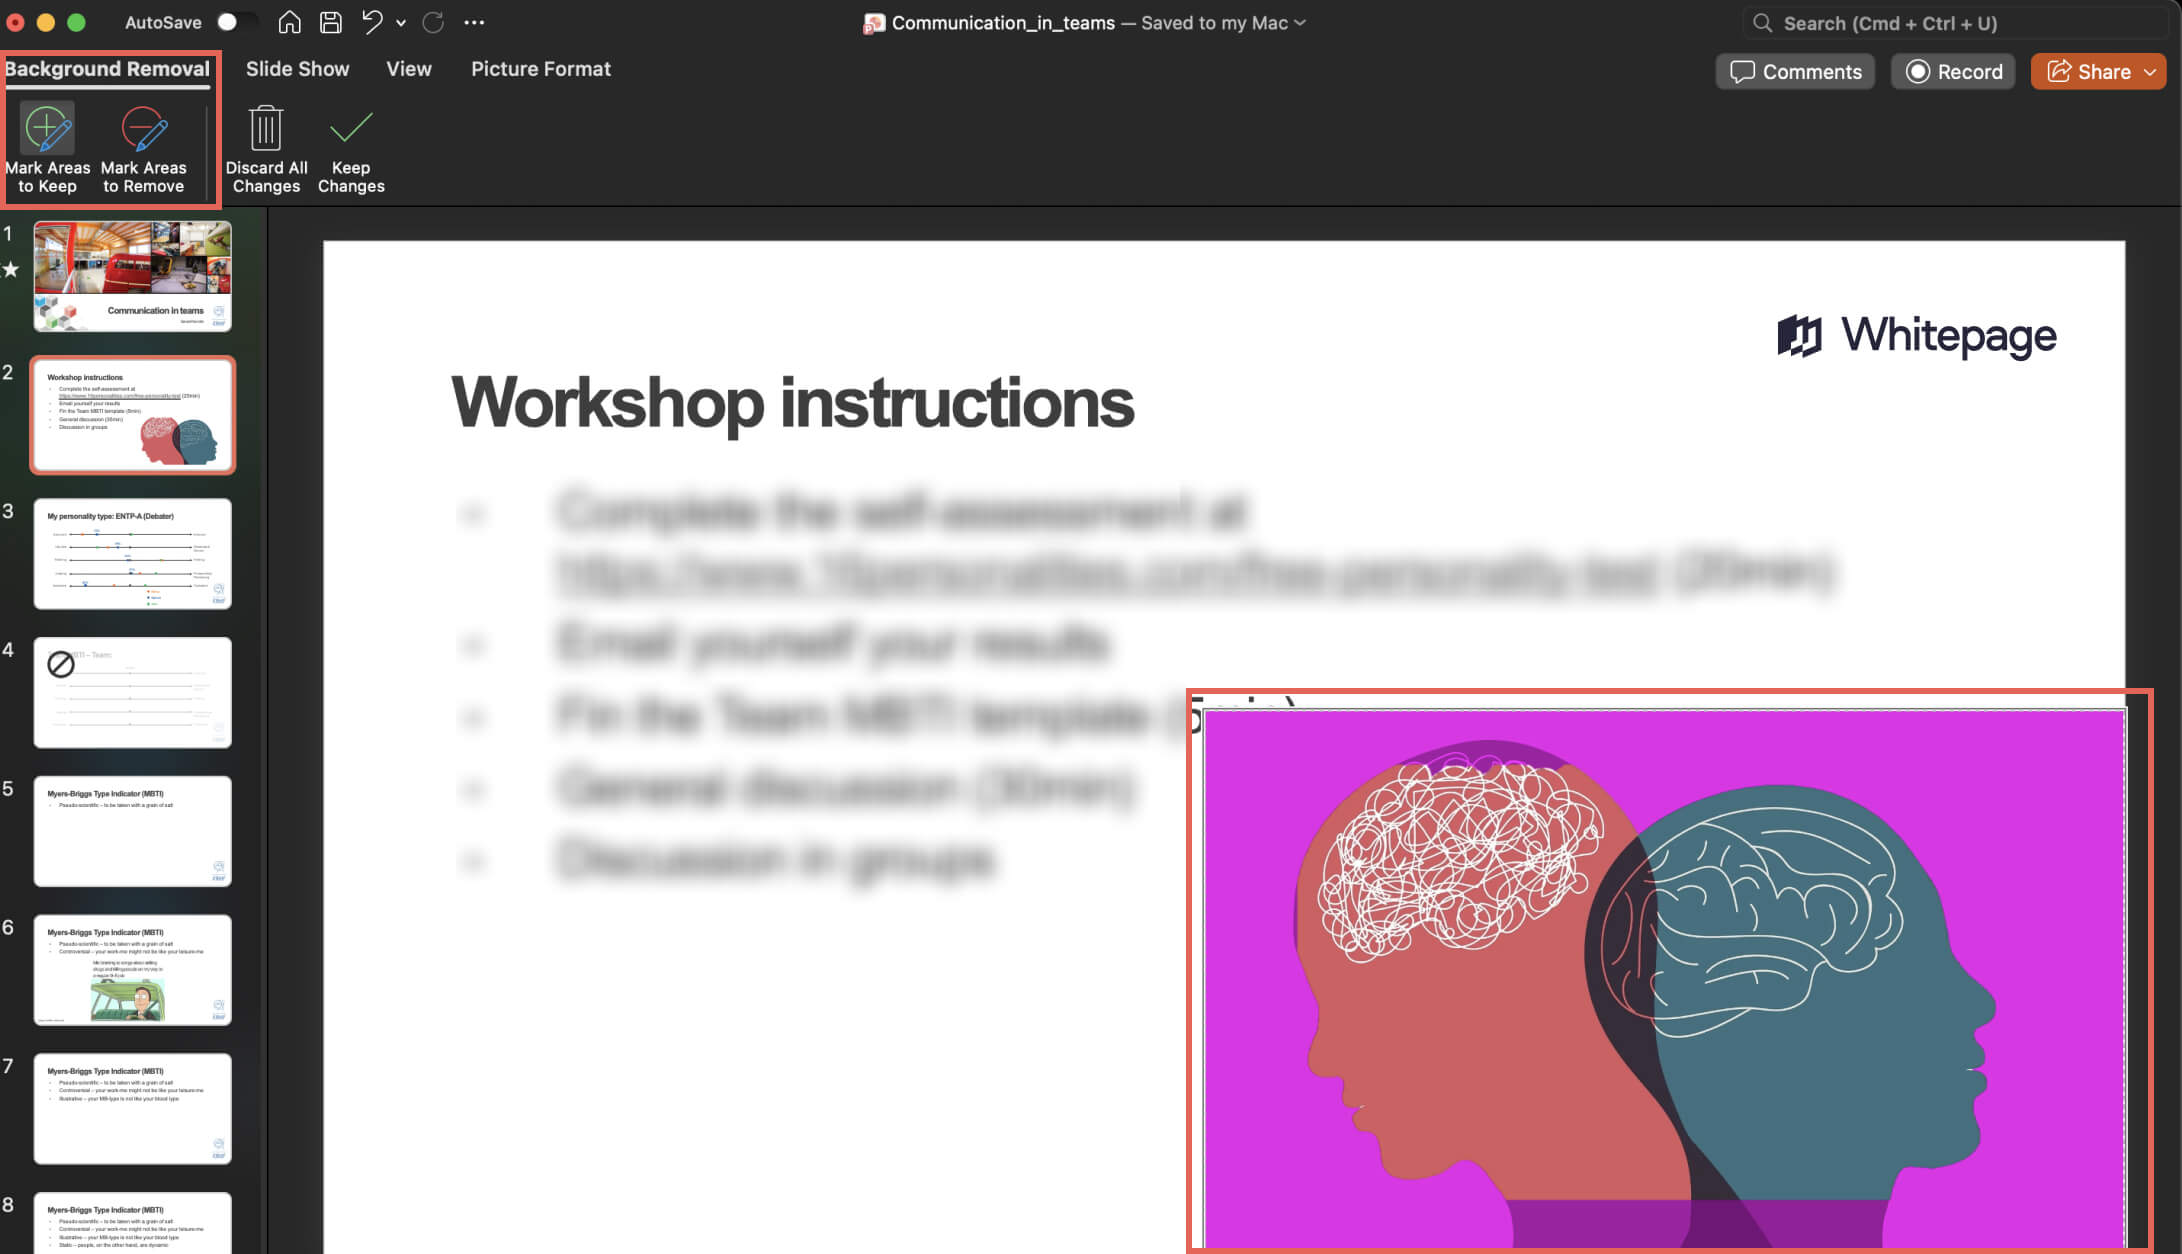
A new Background Removal tab will appear. Here you have two tools:
👆Pro Tip: Don’t click and drag long lines. Use short clicks on each section you want to keep or remove.
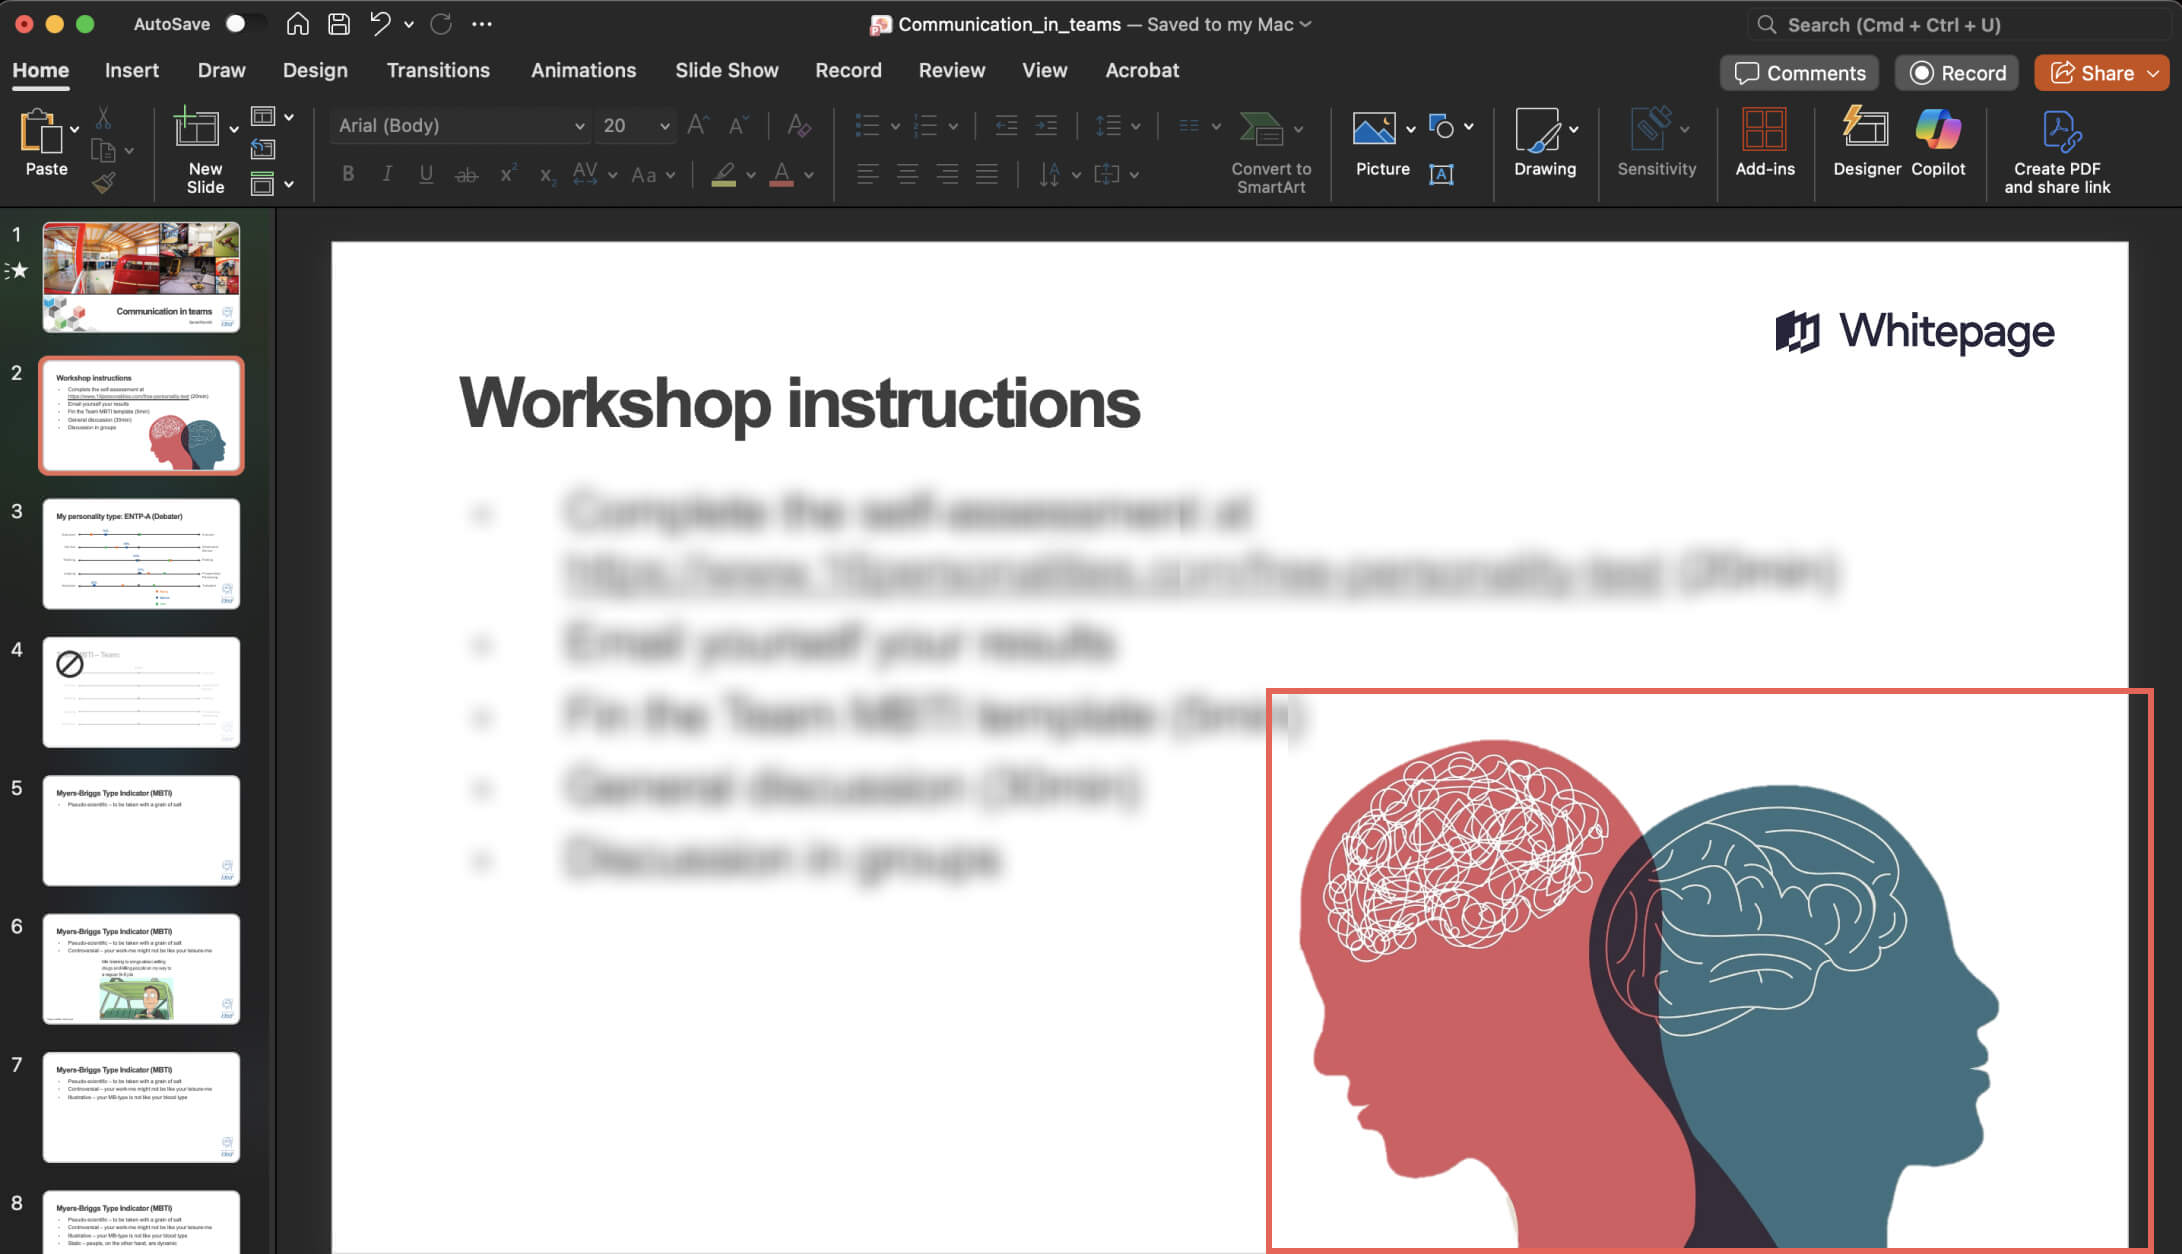
Once you're satisfied with the magenta selection, click Keep Changes.
Often, this tool leaves jagged or pixelated edges. Here’s the fix:
This subtle blur will smooth out the imperfections and give you a cleaner cutout.
You’ve done it! Now, to reuse this image without ever having to remove the background in PowerPoint again:
Now you have a high-quality, reusable asset, perfect for a neat presentation design look.
For simple images, ignore the main "Remove Background" tool completely. There's a faster, one-click solution hidden in the "Color" menu. This is the expert's shortcut.
Click the image with the solid-color background you want to remove.
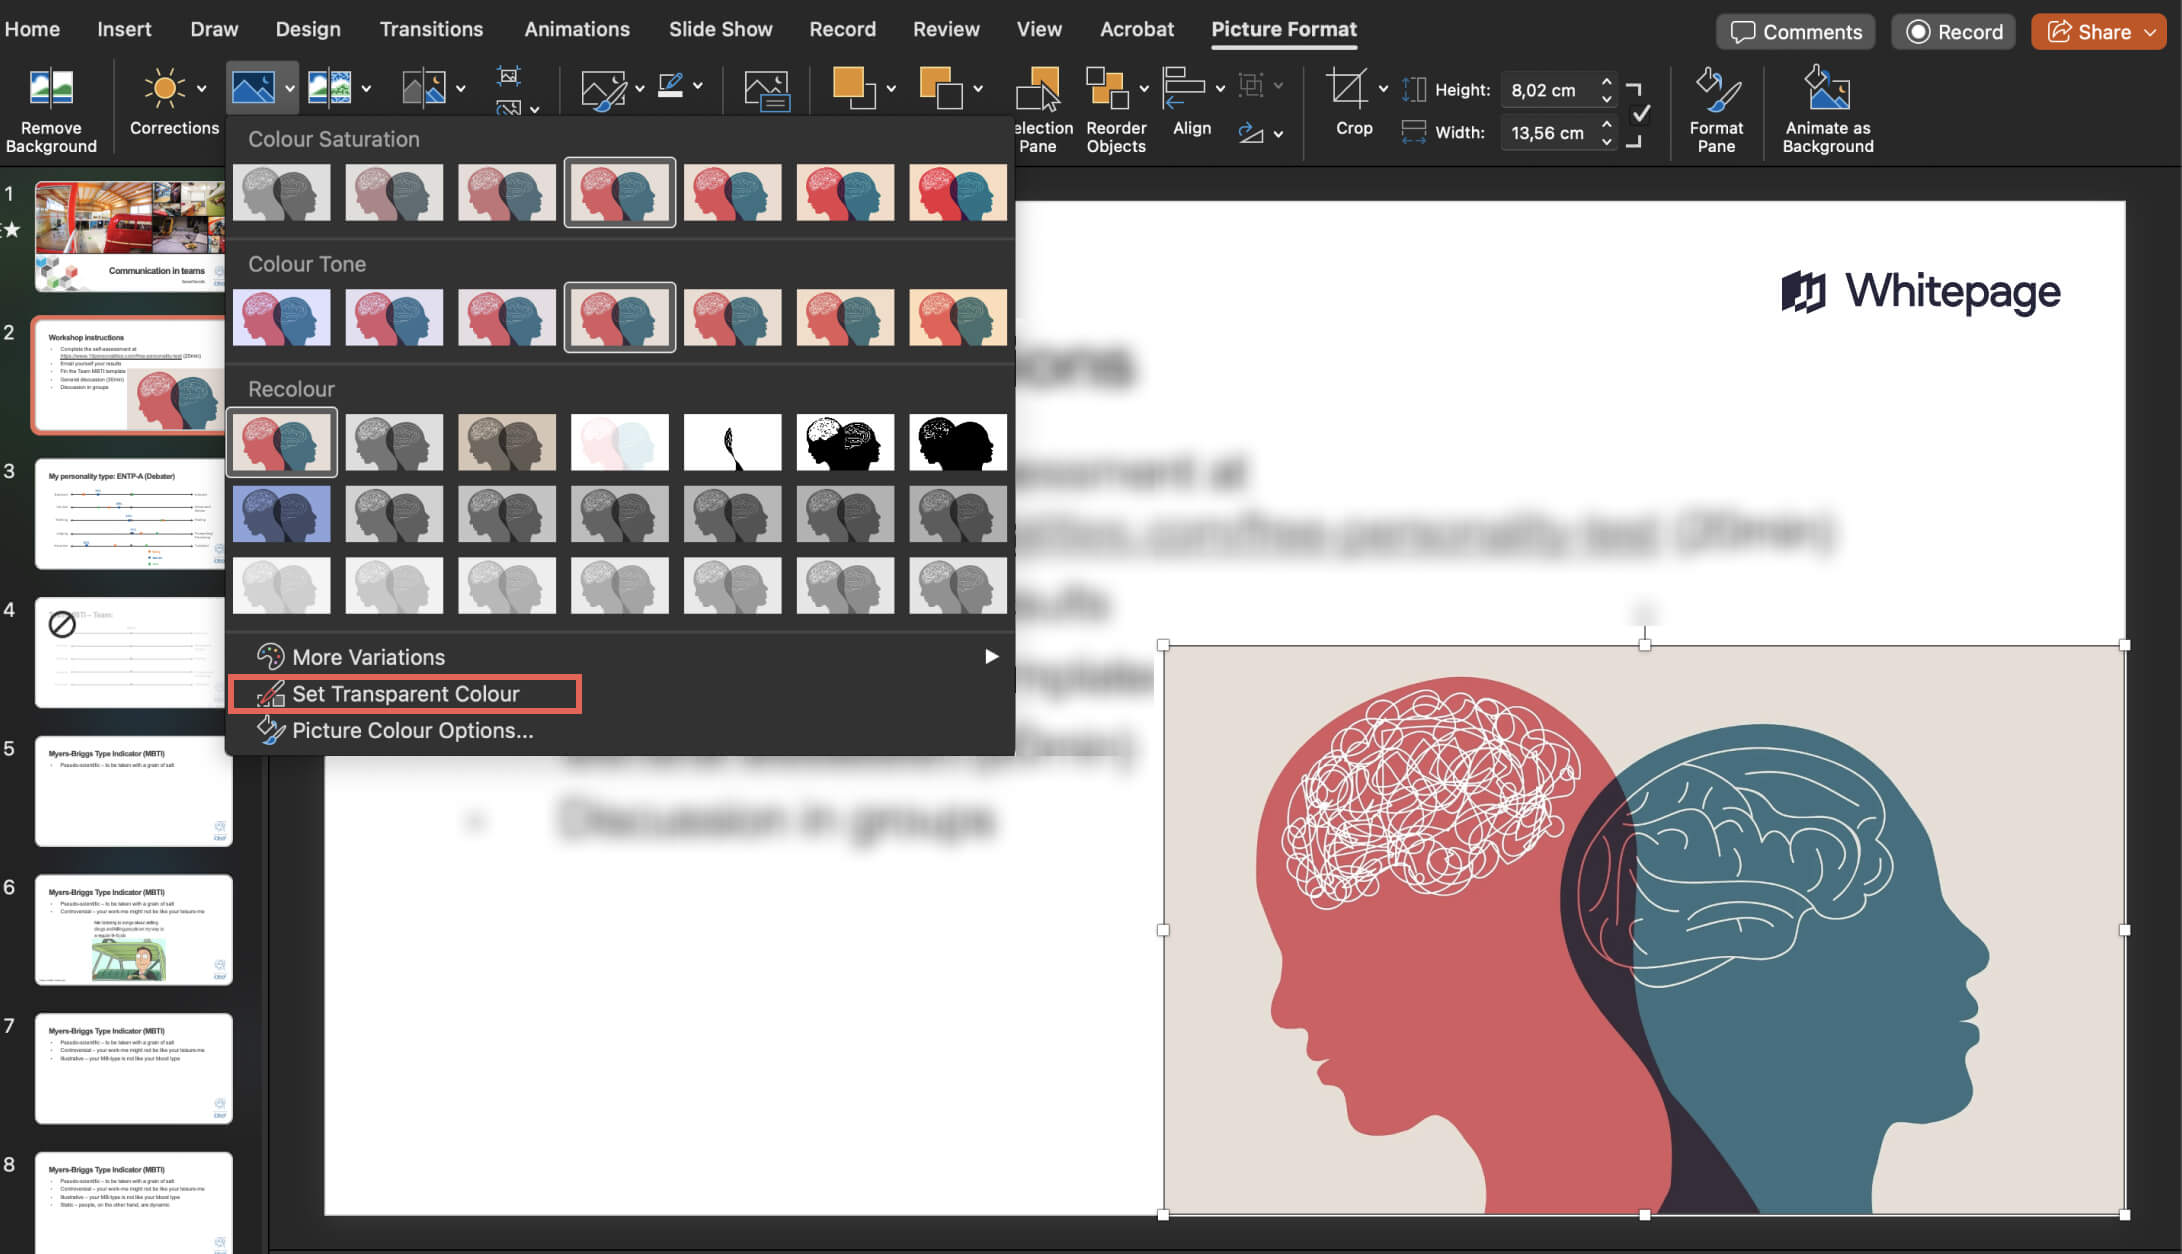
Your cursor will change to an "eyedropper" pen. Click once on the solid background color you want to remove.
It will vanish instantly.
This is the fastest method for how to remove background from an image in PowerPoint when dealing with:
The limitation:
This tool makes all pixels of the color you click transparent. If you click on a white background, it will also remove any white that is inside your logo or subject. For images where the background color also appears in the foreground, use the main "Remove Background" tool instead to avoid one of the common presentation design pitfalls that reduce the quality of design.
The free online version of PowerPoint has a much smarter AI-powered tool. For most images, especially complex ones, it delivers a cleaner result faster.
This is our expert’s choice for how to remove background in PowerPoint online with AI.
In the online tool, you won’t have manual "Mark Areas" brushes to fix mistakes. You have to help the AI focus before you run it.
This step removes the visual noise, leading to a much more accurate result.
The tool will process the image, and the background will disappear.
This process takes less than a minute and is the single best way to remove background from images in PowerPoint.
Sometimes, the native tools aren't enough. If you’re dealing with complex subjects like a person with curly hair, a pet with fur, or a product with glass elements, PowerPoint's built-in AI might struggle.
In these cases, you need a dedicated AI tool. Here are the best options for how to remove background from images in PowerPoint without losing quality.
This is the most convenient professional option because it brings a high-end AI engine directly into your slide deck. Install the add-in, select your image, and click a button in the ribbon. It processes the image instantly without you leaving PowerPoint.
It handles hair and fine details beautifully. However, you will need a paid account to process high-resolution images.
These are the heavyweights of online design. Both offer AI that is often superior to PowerPoint's native tools.
Adobe Express: Offers a high-quality background remover for free (with a basic account). You upload your image, let the AI work, download the transparent PNG, and insert it into your slide.
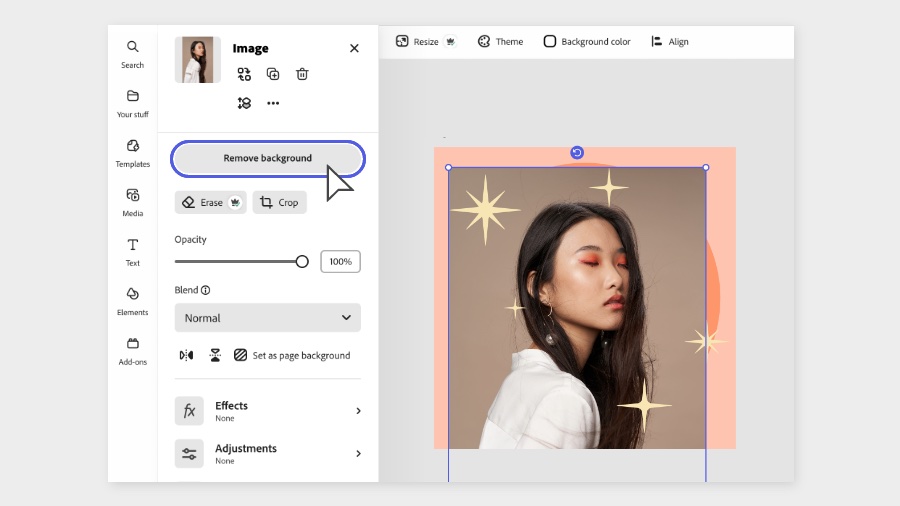
Source: Adobe Express
Canva: Great ease of use. Its background remover only comes with the Canva Pro paid subscription.
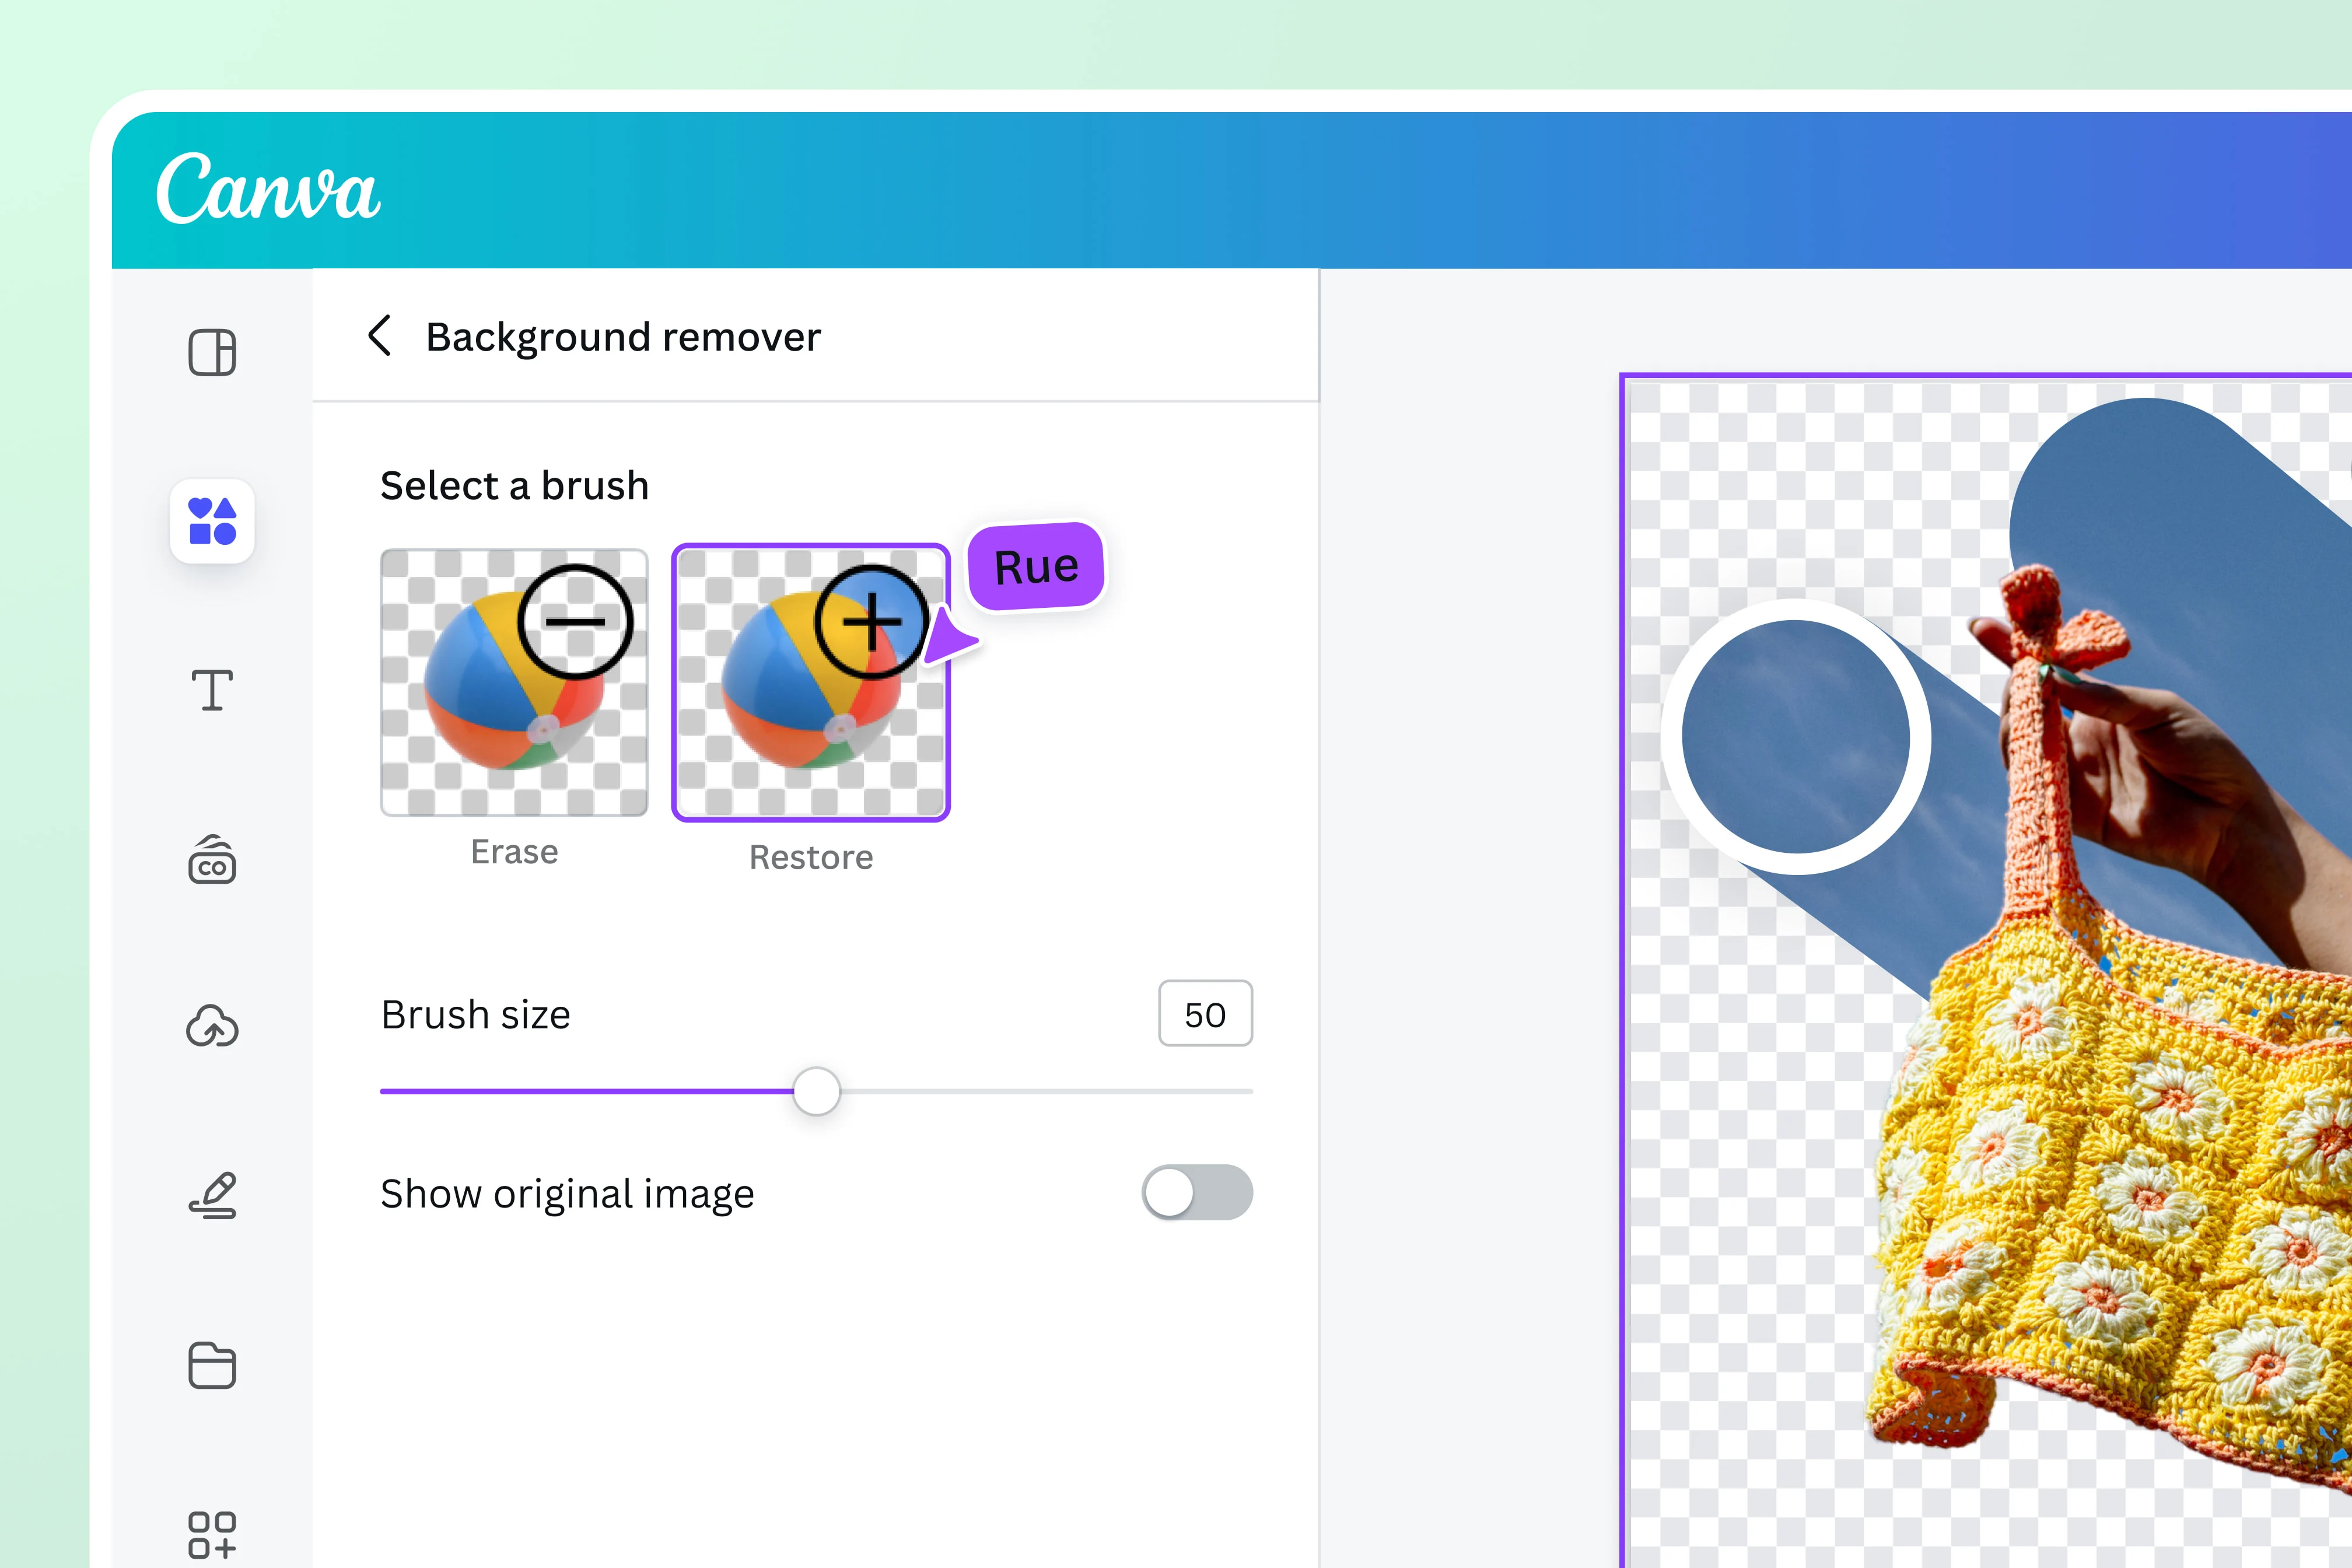
Source: Canva
Use these when quality is your absolute priority.
If you are on a Windows PC, you have a powerful AI tool already. The updated Microsoft Paint now features a one-click background removal button that uses similar tech to the Office 365 web tool.
How to remove background in Microsoft Paint:
It’s a fast, free alternative if you are offline or don't want to use a browser.
Regardless of which tool you choose, these best practices will improve your results.
The AI needs to see where the subject ends, and the background begins. A subject wearing a black shirt against a black wall will confuse even the best tools.
Removing extra visual noise before you start editing gives the software fewer chances to make a mistake.
If you save your edited image as a JPG, the background will turn white, and you’ll lose transparency. Use PNG.
If the edges look sharp, apply a 1-point Soft Edges effect. It blends the subject into the slide and hides pixelation.
Technology isn't perfect. If you run into a wall, here’s the fix.
We've covered a lot of tools. Here’s our expert recommendation on which tool to use for what purpose.
PowerPoint's native one-click "Set Transparent Color" tool.
The PowerPoint Online AI tool. The copy-paste workflow from your desktop is faster and delivers a cleaner result.
A dedicated online tool like Adobe Express.
It's one thing to know how to use the tools. Another is understanding how to build an engaging visual narrative.
Although they are the foundation of a professional deck, clear images are only one aspect of the whole. Whether you are closing an enterprise deal or raising capital, important presentations always benefit from a designed narrative that establishes trust right away.
And this is just what we do. At Whitepage.studio, we put all details in perfect order to craft investor pitch decks and sales presentations that help founders and leaders bring in millions in capital. Contact us today and let’s chat.


The Online (web version) tool is significantly better. It uses a smarter, faster AI that delivers a cleaner result with one click.
Use the "Soft Edges" effect. Select your image, go to Picture Format → Picture Effects → Soft Edges, and apply the 1 Point option.
For a professional result on complex images like these, use a dedicated external tool like Adobe Express (free) or the Remove.bg add-in (paid). Their AI is purpose-built for it.
Yes. Adobe Express offers a free background removal tool that’s widely considered to be one of the best available. It often produces a cleaner, more accurate result than PowerPoint's built-in AI, especially on difficult images.
For speed: The copy-paste workflow using the PowerPoint Online AI. For simple logos: The "Set Transparent Color" tool. For complex images: Use an external tool like Adobe Express, then import the clean PNG.


867 BOYLSTON ST
BOSTON, MA 02116


